Angular快速入门
什么是 Angular?
Angular 是一个由 Google 维护的开源 Web 应用框架,用于帮助我们构建高性能、高效率的单页应用(SPA)。它提供了一套丰富的工具和库,包括但不限于组件开发套件(CDK)、路由、表单管理、客户端服务器通信以及更多,一切都为了简化开发过程,优化应用性能。
Angular 的核心特性如双向数据绑定、依赖注入和模块化开发,都适用于开发大型、可维护的应用。此外,Angular 的强大生态系统和社区支持也为开发者提供了额外的资源和工具,进一步加速开发流程。
快速入门
下面,我们跟着官方教程,先快速入门 Angular 框架,创建第一个Angular 应用。
假设你已经拥有以下能力
- 可通过直接编辑 HTML 创建网页。
- 能使用 JavaScript 编写网站内容。
- 会阅读并理解 CSS 以及选择器的使用。
- 能够使用命令行指令执行计算机任务。
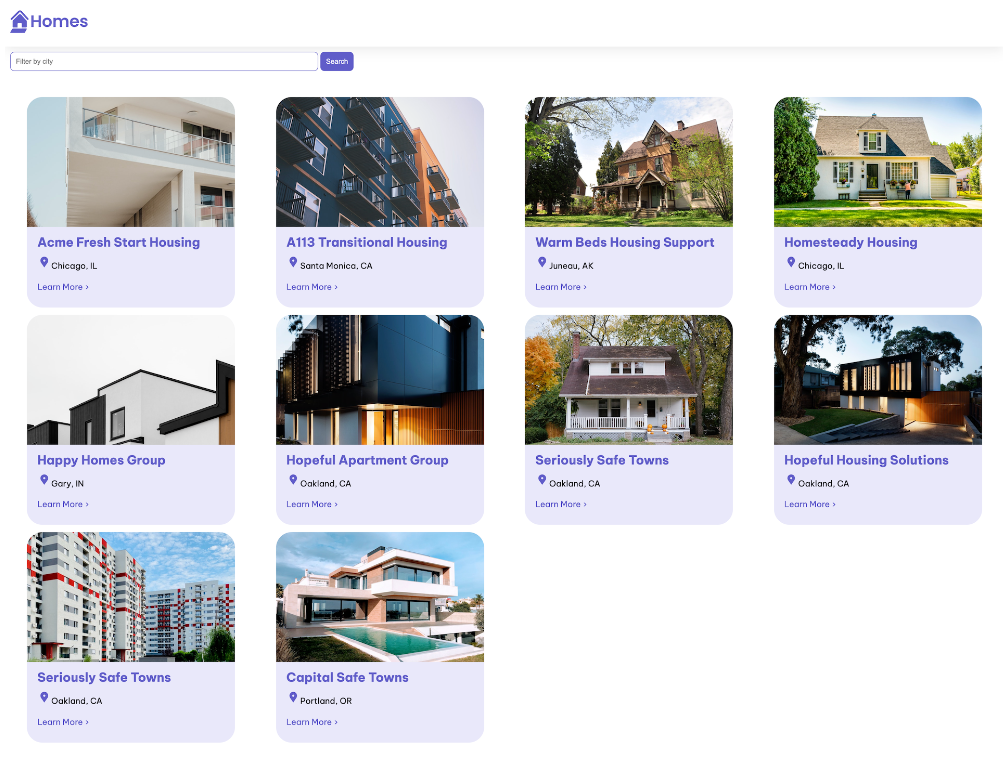
根据官方教程,我们会创建并完善一个Angular应用,该应用功能包括列出出租房屋及显示每个房屋的详细信息。在这个过程中,将会使用到Angular中的多个常见特性。
应用演示效果如下:
你也可以直接阅读官方教程,地址如下:
本地开发环境
Node
识别 Angular 所需的 Node.js 版本是否符合要求。首先打开终端窗口,运行以下命令:
node --version检查你的 Node.js 版本是否符合 Angular 所需的活跃 LTS 或维护 LTS 版本:
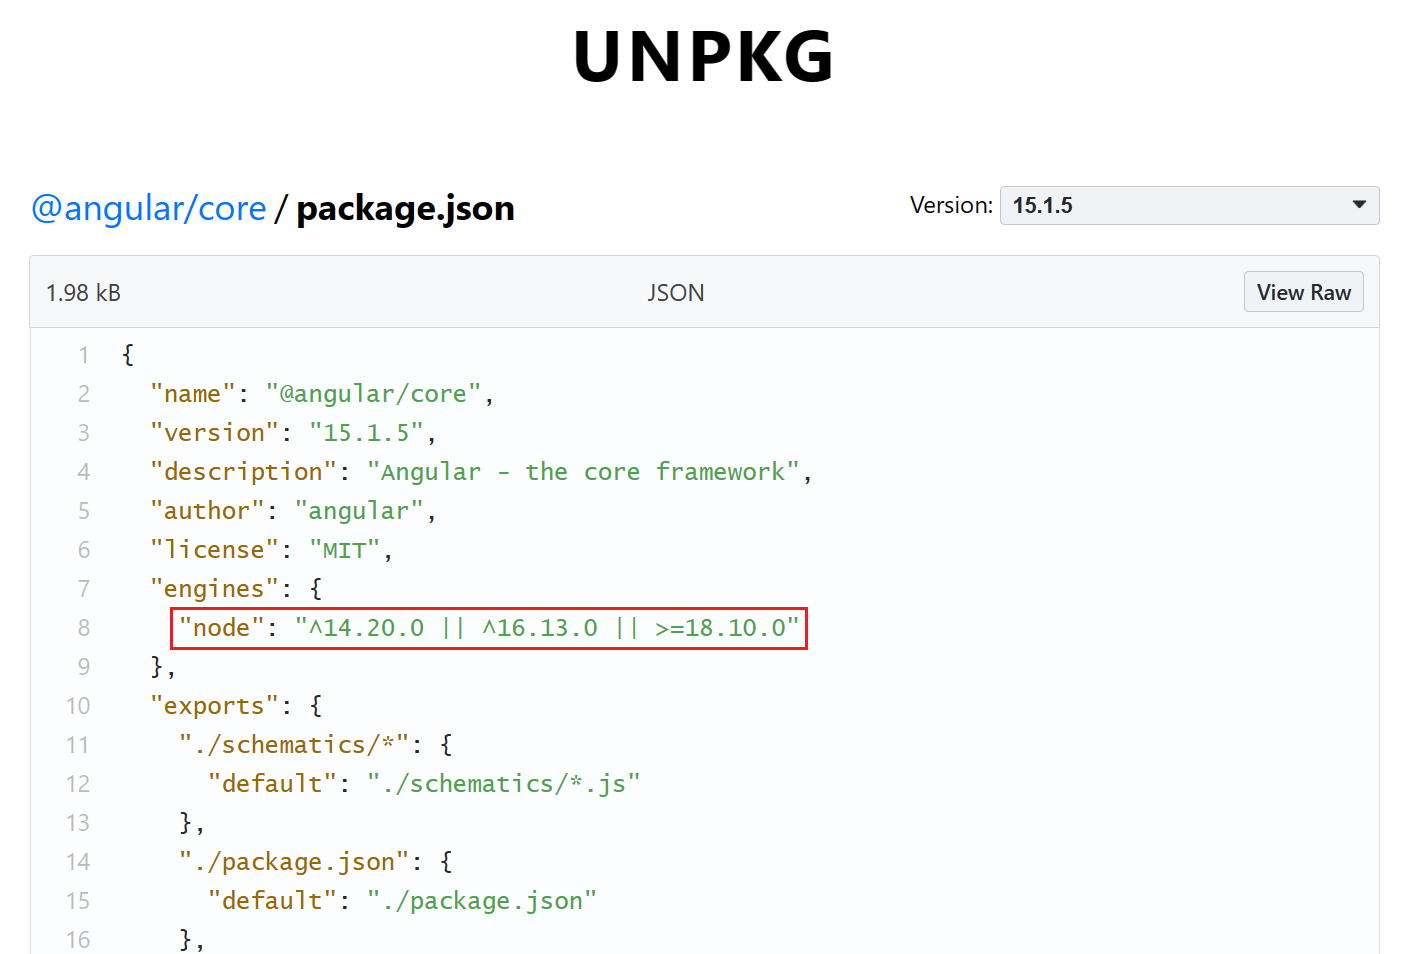
如果你的 Node.js 版本不符合要求,访问 nodejs.org 根据安装说明更新或安装正确的 Node.js 版本。
Angular CLI
安装了 Node.js 和 npm 后,我们需要安装 Angular CLI ,一个有效的 Angular 开发工具。
打开终端窗口,运行以下命令:
npm install -g @angular/cli这将全局安装 Angular CLI,使其在我们系统上的任何位置都可用。
完成安装后,运行 ng version 命令可检查是否安装成功:
C:\Users\zhengyiyi>ng version

     _                      _                 ____ _     ___
    / \   _ __   __ _ _   _| | __ _ _ __     / ___| |   |_ _|
   / △ \ | '_ \ / _` | | | | |/ _` | '__|   | |   | |    | |
  / ___ \| | | | (_| | |_| | | (_| | |      | |___| |___ | |
 /_/   \_\_| |_|\__, |\__,_|_|\__,_|_|       \____|_____|___|
                |___/


Angular CLI: 18.0.7
Node: 20.11.1
Package Manager: npm 8.19.4
OS: win32 x64

Angular: undefined
...

Package                      Version
------------------------------------------------------
@angular-devkit/architect    0.1800.7 (cli-only)
@angular-devkit/core         18.0.7 (cli-only)
@angular-devkit/schematics   18.0.7 (cli-only)
@schematics/angular          18.0.7 (cli-only)
开发工具
推荐使用 Visual Studio Code 作为开发工具,构建 Angular 应用。
另外,你还可以安装 Angular 语言服务以提升开发体验,运行以下命令即可:
npm install -g @angular/language-serviceHello World
下面,我们通过计算机传统项目 Hello World 来认识 Angular。首先,将项目代码克隆到本地:
git clone -b homes-app-start git@github.com:angular/codelabs.git homes-app该命令会从 GitHub 克隆 homes-app-start 分支到名为 homes-app 的文件夹中。
克隆项目后,切换到项目目录:
cd homes-app然后,安装项目依赖:
npm install这一步会根据项目根目录下的 package.json 文件中列出的依赖项,下载并安装所需的所有包。
依赖安装完成后,我们可以启动开发服务器来运行应用程序:
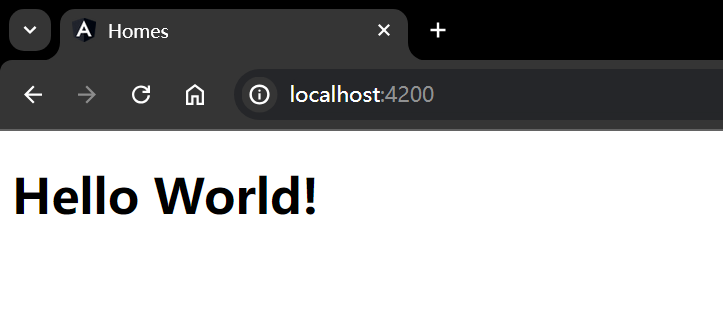
ng serveng serve 命令会启动一个开发服务器,并在 http://localhost:4200 上提供应用程序。
我们可以打开浏览器并访问这个地址,此时可看到以下内容:
项目结构
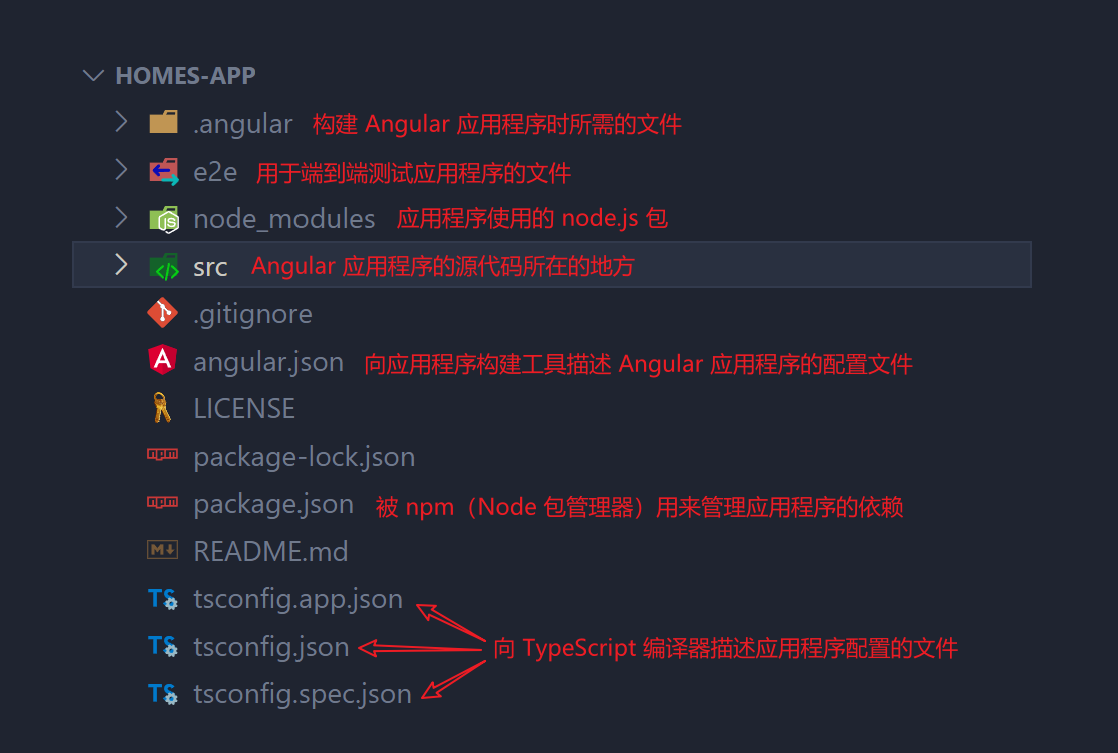
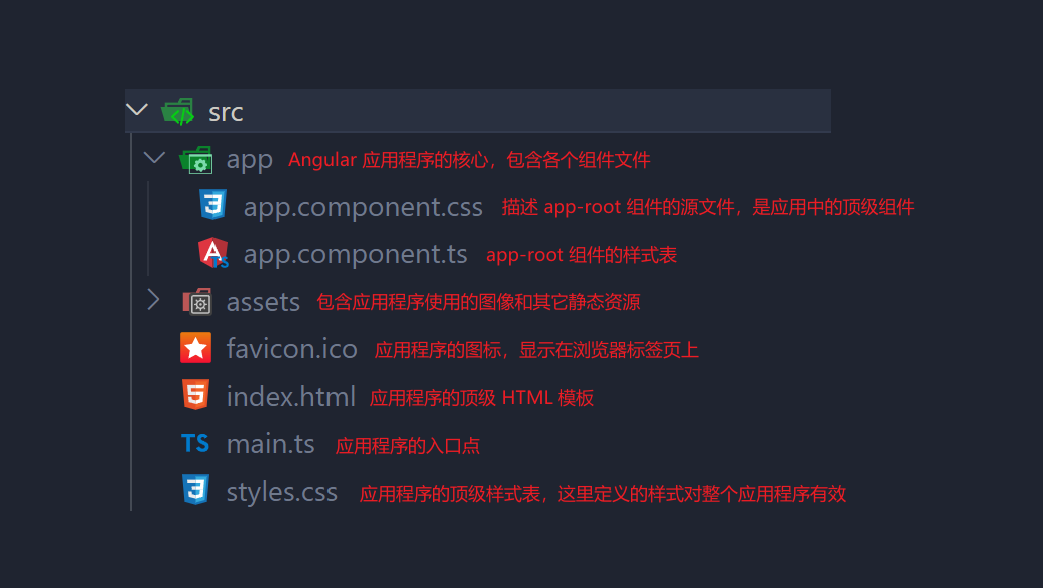
其中,src 目录是我们主要的工作目录,它包含了应用程序的逻辑、样式、图片和 HTML 模板:
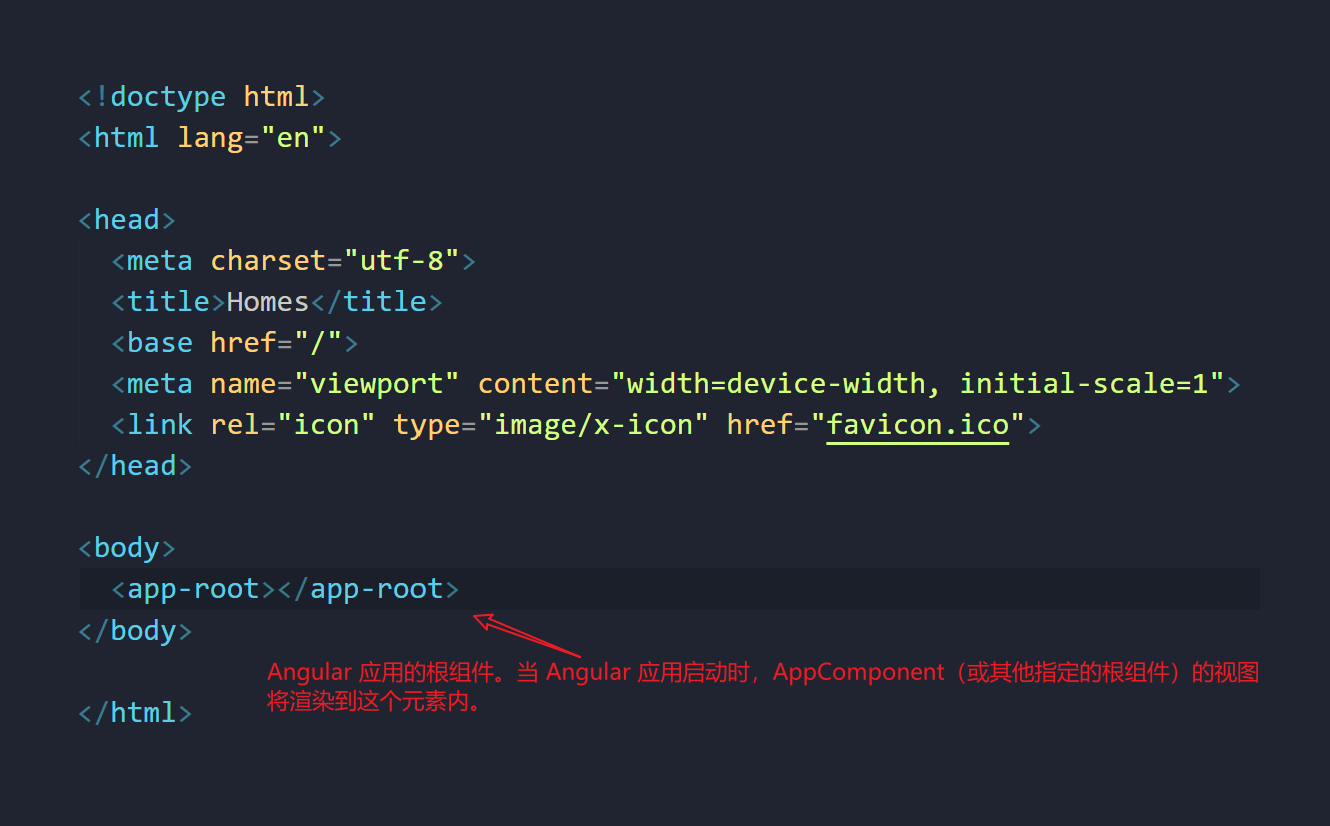
所有的 Angular 组件都会在 index.html 文档中通过 <app-root></app-root> 标签被加载:
main.ts 是应用程序的入口点,Angular 通过这个文件启动并运行应用程序。

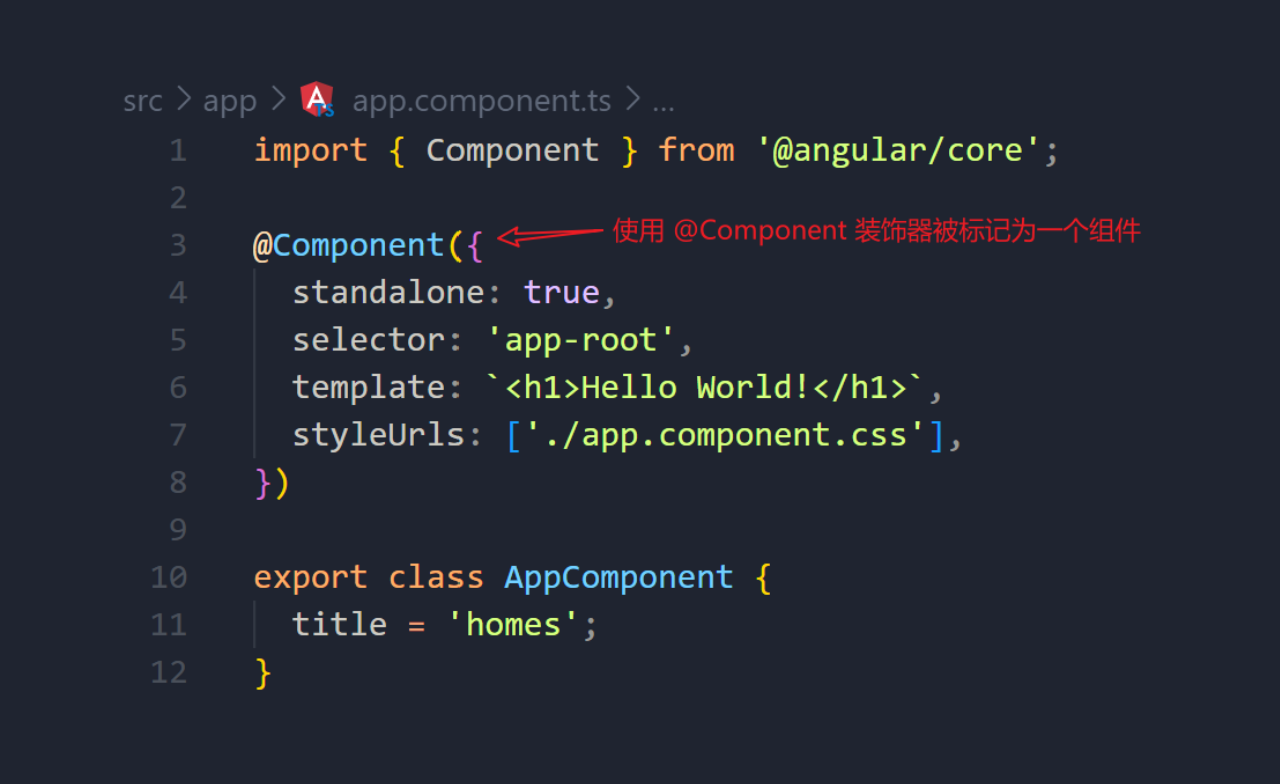
app.component.ts中定义的 AppComponent 是顶级组件,即应用的主组件(组件树的根):
更多相关内容:
认识组件
Angular 组件是构建 Angular 应用程序的基本构建块,每个组件都封装了应用程序的一部分功能。
import {Component} from '@angular/core';

// 装饰器 (Decorator): 用于标记类并提供关于它的元数据
@Component({
    selector: 'app-root',
    standalone: true,
    imports: [], // 在这里列出需要导入的其他组件或模块
    template: `
    <h1>Hello world!</h1>
  `,
    styleUrls: ['./app.component.css'],
})

// 类 (Class): 用于处理数据和逻辑
export class AppComponent {
    title = 'homes';
    // 这里可以添加更多的属性和方法,用于处理组件的逻辑
}
其中:
selector: 'app-root'表示该组件可以通过在 HTML 文档中通过<app-root></app-root>标签来引用。standalone: true表示该组件是独立的,可以不依赖 Angular 模块(NgModule)单独使用。这是 Angular 14 引入的新特性。template定义了组件的 HTML 模板,即组件的视图。styleUrls指定了组件样式文件的位置。
创建并应用新组件
创建Home组件
使用 Angular CLI 创建新组件,跳过自动导入到模块:
ng generate component home --skip-import使用
--skip-import参数避免自动添加到NgModule,手动管理组件导入。
完成上述命令后, src/app 目录下会生成一个 home 文件夹,其中包含以下四个文件:
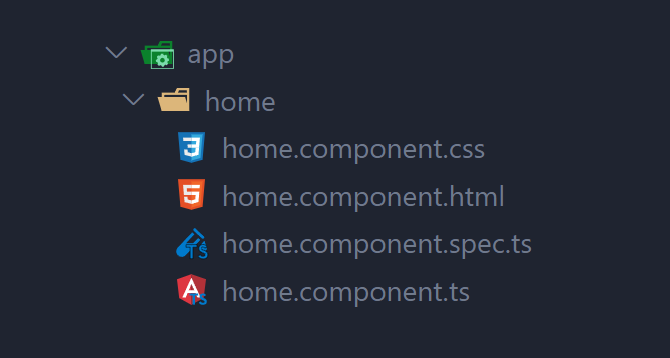
home.component.ts:组件逻辑和装饰器定义。home.component.html:组件 HTML 模板。home.component.css:组件样式文件。home.component.spec.ts:组件单元测试文件。
我们可以在 @Component 装饰器 中添加 standalone: true, 表示该组件是一个独立组件:
// home.component.ts
import { Component } from '@angular/core';

// 使用 @Component 装饰器来定义组件的元数据
@Component({
    selector: 'app-home',
    templateUrl: './home.component.html',
    styleUrls: ['./home.component.css'],
    standalone: true // 添加这一行,表示该组件是独立的
})

// 定义 HomeComponent 类,这个类就是我们的组件类
export class HomeComponent {
    // 在这个类中可以定义组件的属性和方法
}
引入Home组件到根组件中
我们打开 src/app 目录下的 app.component.ts 文件,并在顶部导入 HomeComponent 组件:
import {HomeComponent} from './home/home.component';在 @Component中更新 imports数组属性,并添加 HomeComponent:
imports: [HomeComponent],接着,我们更新template属性:
template: `
    <main>
      <header class="brand-name">
        <img class="brand-logo" src="/assets/logo.svg" alt="logo" aria-hidden="true" />
      </header>
      <section class="content">
        <app-home></app-home>
      </section>
    </main>
  `,
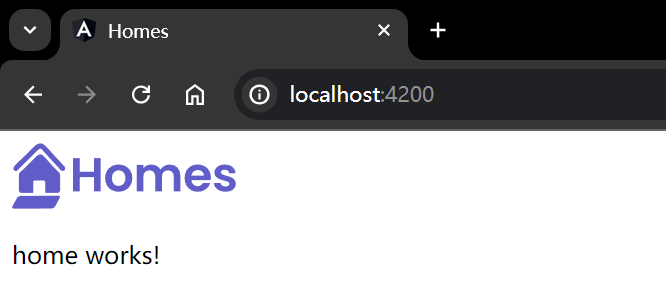
此时保存修改并刷新页面,效果如下(如果 ng serve未运行,请重新启动):
修改Home组件内容
在上面的内容中,我们生成了一个子组件 HomeComponent 并导入至根组件 AppComponent中。
现在,我们可以进一步修改Home组件 HomeComponent 的内容。
首先打开 home.component.ts 文件,在 @Component中修改 template属性:
template: `
    <section>
      <form>
        <input type="text" placeholder="Filter by city" />
        <button class="primary" type="button">Search</button>
      </form>
    </section>
  `,
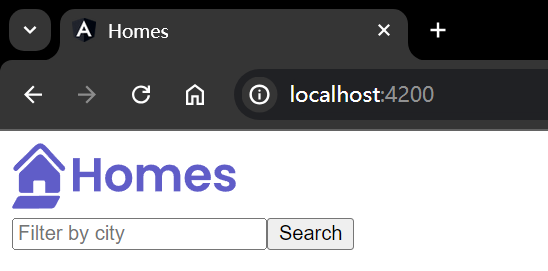
此时刷新页面,效果如下:
由于需要有一个组件来呈现搜索结果,因此我们可以再创建一个新的组件,运行以下命令:
ng generate component HousingLocation --standalone --inline-template--standalone选项表示生成独立组件,--inline-template表示使用内联模板而不是外部 HTML 文件。
通常,Angular 组件的模板会被放在一个单独的 HTML 文件中。使用
--inline-template可以改为内联模式。
创建好新的组件后,我们打开 home.component.ts ,添加以下内容:
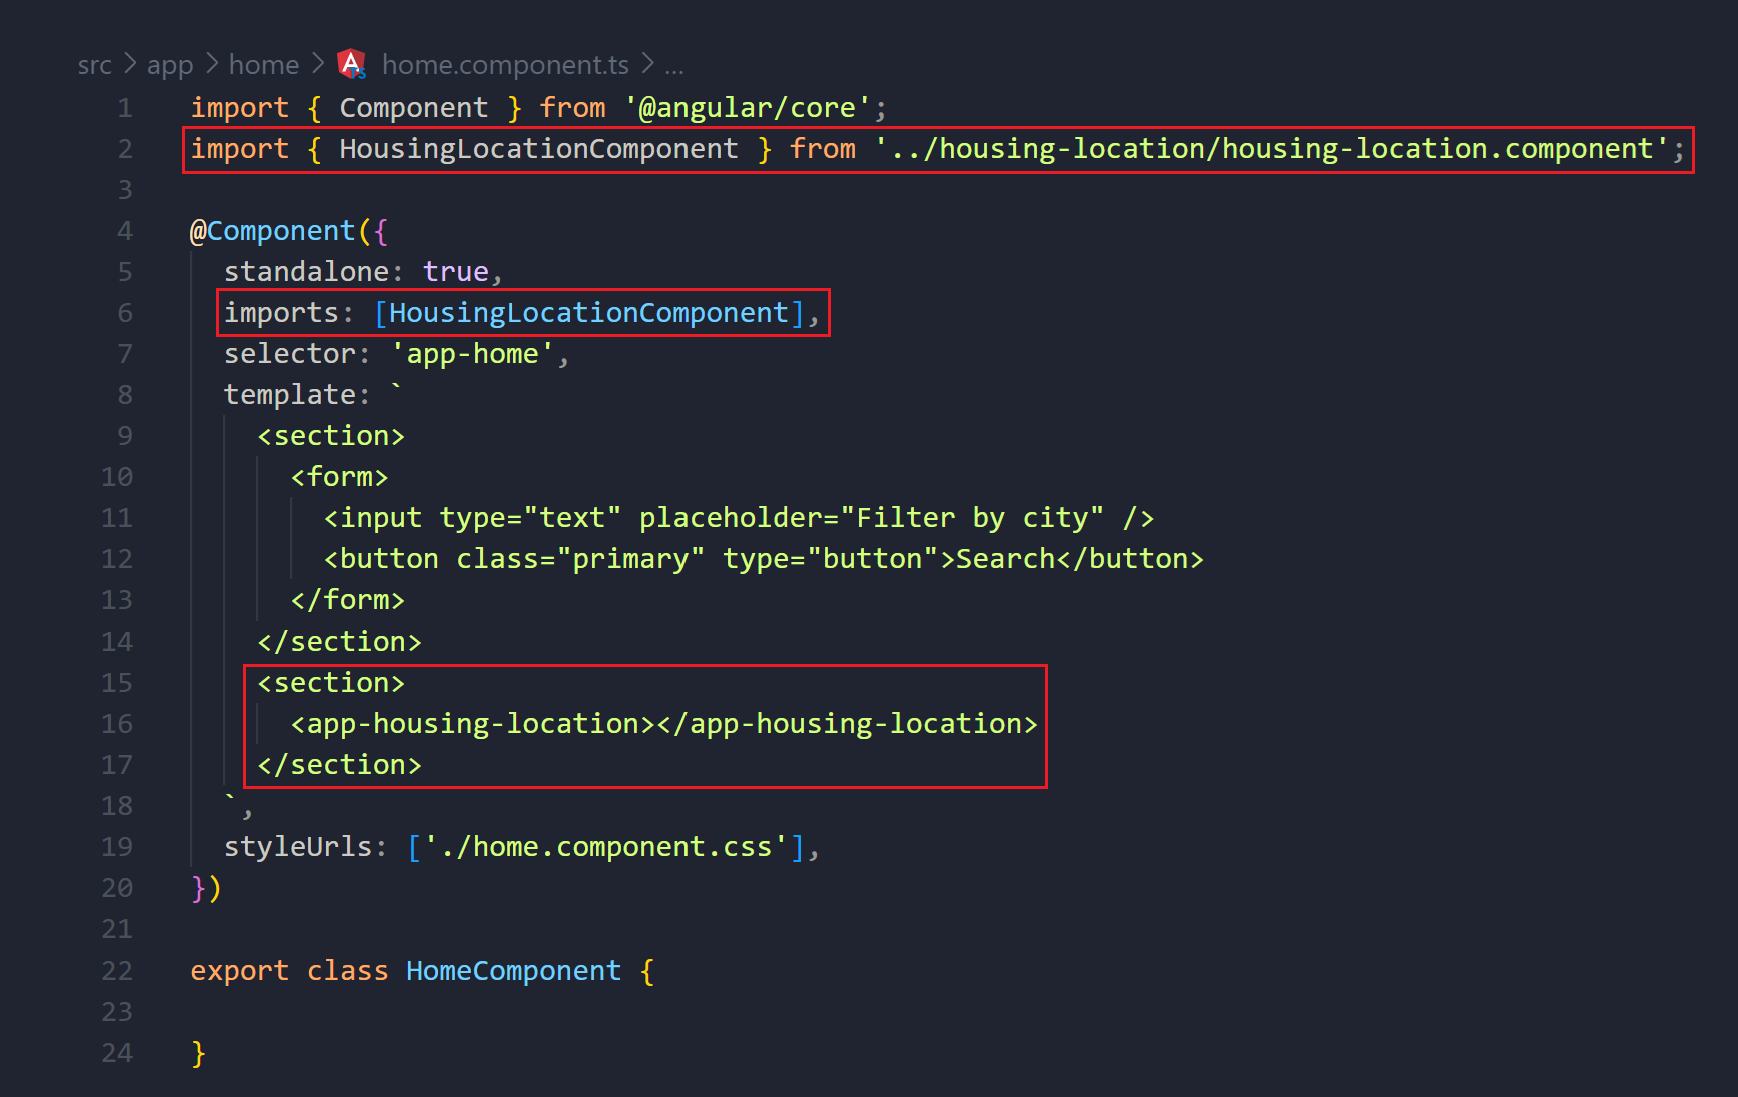
此时刷新页面,效果如下:
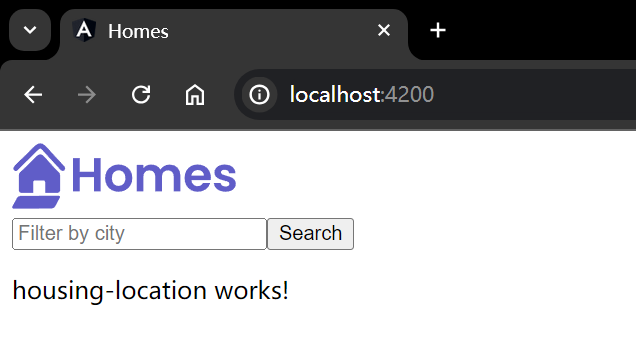
更多相关内容:
完善页面效果
Angular 接口(Interface)
接口(Interface)是 TypeScript 的一个特性,用于定义对象的结构。通过定义接口,你可以指定一个对象应该包含哪些属性和方法,以及它们的类型。
使用 ng generate interface 命令可以快速创建一个接口。
在这里,我们可以定义一个表示住房位置的接口 HousingLocation,在终端中运行以下命令:
ng generate interface housingLocation这将在项目中创建一个新的 TypeScript 文件,其中包含 HousingLocation 接口的基本结构。我们根据需要添加属性:
export interface HousingLocation {
	id: number,
    name: string,
    city: string,
    state: string,
    photo: string,
    availableUnits: number,
    wifi: boolean,
    laundry: boolean
}
输入属性与模板语法
在 Angular 中,@Input() 装饰器允许我们将数据从父组件传递到子组件。这是组件通信的一种方式。通过在子组件的类定义中使用 @Input() 装饰器,可以标记一个字段作为输入属性。
此外,Angular 提供了多种数据绑定方式,其中最常见的是文本插值和属性绑定。
- 文本插值:使用双花括号
{{ }}来显示组件类中的属性值。例如,{{ location.city }}会显示location对象的city属性值。 - 属性绑定:使用方括号
[ ]来绑定目标属性到表达式。例如,<img [src]="location.imageUrl">会将<img>的src属性绑定到location对象的imageUrl属性。
在这里,HousingLocationComponent 组件需要从父组件接收一个 HousingLocation 对象,那么我们可以这样修改 housing-location.component.ts 文件:
import { Component, Input } from '@angular/core';
import { CommonModule } from '@angular/common';
import { HousingLocation } from '../housing-location';

@Component({
  selector: 'app-housing-location',
  standalone: true,
  imports: [CommonModule],
  template: `
    <section class="listing">
      <img class="listing-photo" [src]="housingLocation.photo" alt="Exterior photo of {{housingLocation.name}}" >
      <h2 class="listing-heading"> {{housingLocation.name}} </h2>
      <p class="listing-location"> {{ housingLocation.city }}, {{ housingLocation.state }} </p>
    </section>
  `,
  styleUrls: ['./housing-location.component.css']
})

export class HousingLocationComponent {
  @Input() housingLocation !: HousingLocation;
}
结构指令
结构指令是用来修改 DOM 布局的指令。*ngFor 是 Angular 提供的一种结构指令,用于循环渲染一个列表。
在这里,我们想渲染住房位置列表,那么可以在home.component.ts 模板中这样使用 *ngFor 指令:
import { Component } from '@angular/core';
import { CommonModule } from '@angular/common';
import { HousingLocationComponent } from '../housing-location/housing-location.component';
import { HousingLocation } from '../housing-location';

@Component({
  standalone: true,
  imports: [HousingLocationComponent, CommonModule],
  selector: 'app-home',
  template: `
    <section>
      <form>
        <input type="text" placeholder="Filter by city" />
        <button class="primary" type="button">Search</button>
      </form>
    </section>
    <section class="results">
      <app-housing-location *ngFor="let housingLocation of housingLocationList"
      [housingLocation]="housingLocation">
      </app-housing-location>
    </section>
  `,
  styleUrls: ['./home.component.css'],
})

export class HomeComponent {
  housingLocationList: HousingLocation[] = [
    {
      id: 0,
      name: 'Acme Fresh Start Housing',
      city: 'Chicago',
      state: 'IL',
      photo: '/assets/bernard-hermant-CLKGGwIBTaY-unsplash.jpg',
      availableUnits: 4,
      wifi: true,
      laundry: true
    },
    {
      id: 1,
      name: 'A113 Transitional Housing',
      city: 'Santa Monica',
      state: 'CA',
      photo: '/assets/brandon-griggs-wR11KBaB86U-unsplash.jpg',
      availableUnits: 0,
      wifi: false,
      laundry: true
    },
    {
      id: 2,
      name: 'Warm Beds Housing Support',
      city: 'Juneau',
      state: 'AK',
      photo: '/assets/i-do-nothing-but-love-lAyXdl1-Wmc-unsplash.jpg',
      availableUnits: 1,
      wifi: false,
      laundry: false
    },
    {
      id: 3,
      name: 'Homesteady Housing',
      city: 'Chicago',
      state: 'IL',
      photo: '/assets/ian-macdonald-W8z6aiwfi1E-unsplash.jpg',
      availableUnits: 1,
      wifi: true,
      laundry: false
    },
    {
      id: 4,
      name: 'Happy Homes Group',
      city: 'Gary',
      state: 'IN',
      photo: '/assets/krzysztof-hepner-978RAXoXnH4-unsplash.jpg',
      availableUnits: 1,
      wifi: true,
      laundry: false
    },
    {
      id: 5,
      name: 'Hopeful Apartment Group',
      city: 'Oakland',
      state: 'CA',
      photo: '/assets/r-architecture-JvQ0Q5IkeMM-unsplash.jpg',
      availableUnits: 2,
      wifi: true,
      laundry: true
    },
    {
      id: 6,
      name: 'Seriously Safe Towns',
      city: 'Oakland',
      state: 'CA',
      photo: '/assets/phil-hearing-IYfp2Ixe9nM-unsplash.jpg',
      availableUnits: 5,
      wifi: true,
      laundry: true
    },
    {
      id: 7,
      name: 'Hopeful Housing Solutions',
      city: 'Oakland',
      state: 'CA',
      photo: '/assets/r-architecture-GGupkreKwxA-unsplash.jpg',
      availableUnits: 2,
      wifi: true,
      laundry: true
    },
    {
      id: 8,
      name: 'Seriously Safe Towns',
      city: 'Oakland',
      state: 'CA',
      photo: '/assets/saru-robert-9rP3mxf8qWI-unsplash.jpg',
      availableUnits: 10,
      wifi: false,
      laundry: false
    },
    {
      id: 9,
      name: 'Capital Safe Towns',
      city: 'Portland',
      state: 'OR',
      photo: '/assets/webaliser-_TPTXZd9mOo-unsplash.jpg',
      availableUnits: 6,
      wifi: true,
      laundry: true
    }
  ];
}
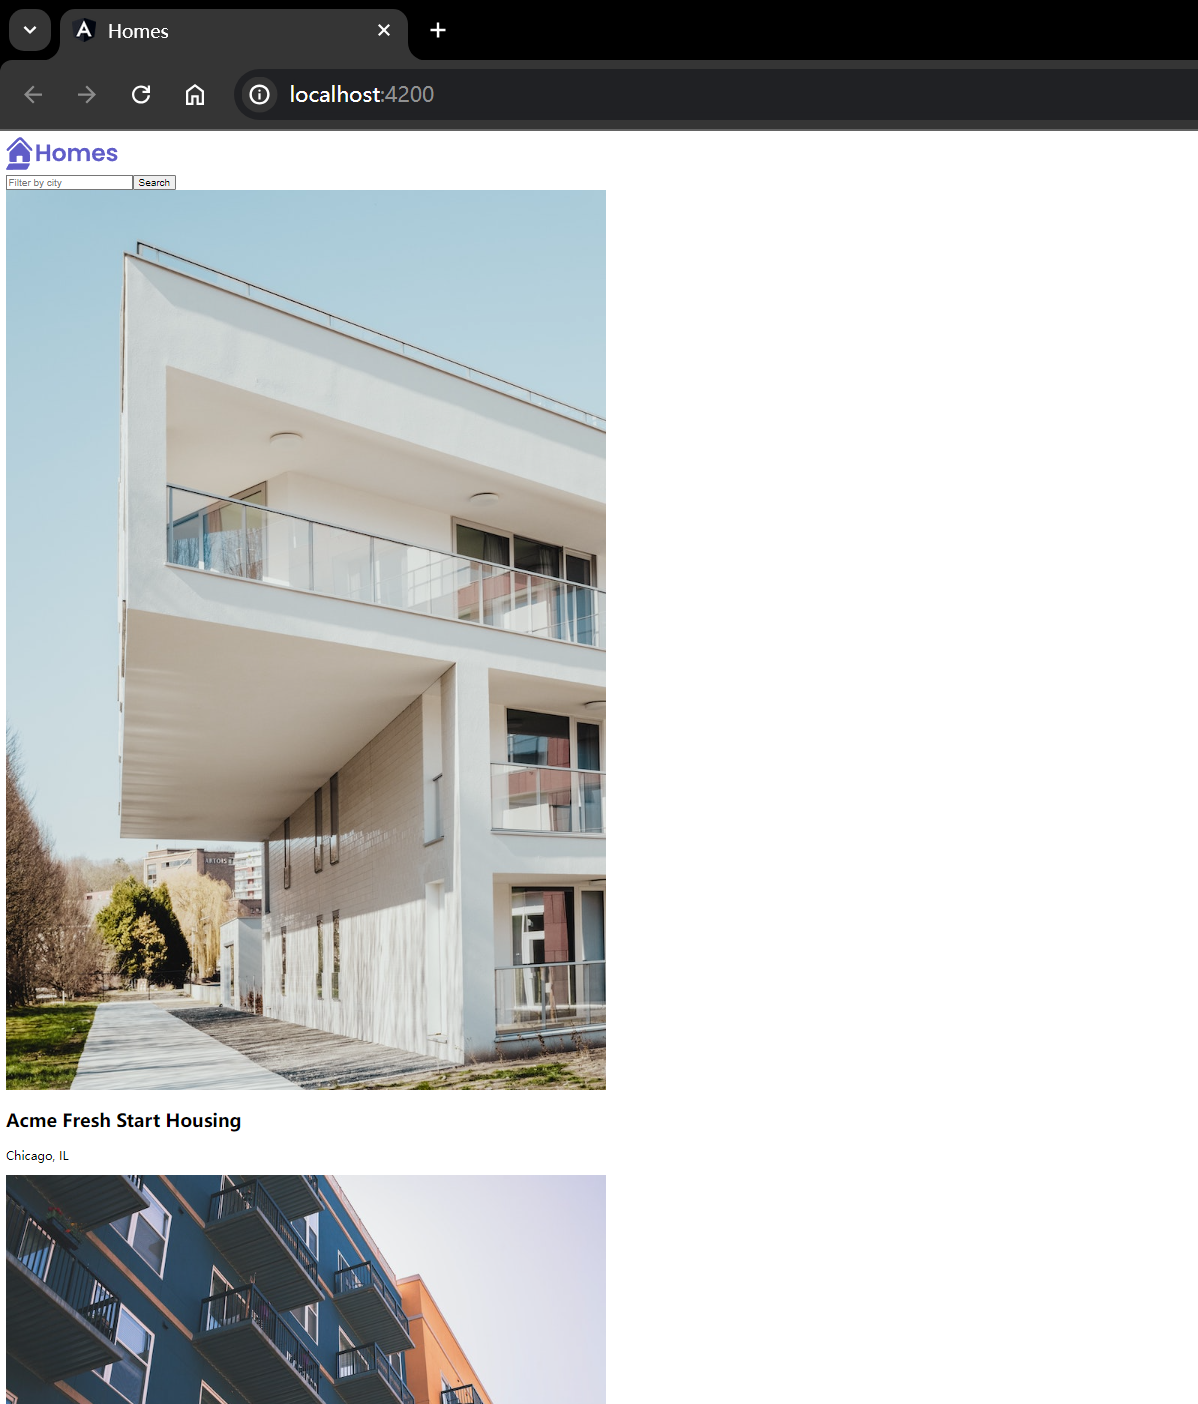
刷新页面,效果如下:
修改样式
app.component.css:
:host {
    --content-padding: 10px;
}

header {
    display: block;
    height: 60px;
    padding: var(--content-padding);
    box-shadow: 0px 5px 25px var(--shadow-color);
}

.content {
    padding: var(--content-padding);
}home.component.css:
.results {
  display: grid;
  column-gap: 14px;
  row-gap: 14px;
  grid-template-columns: repeat(auto-fill, minmax(400px, 400px));
  margin-top: 50px;
  justify-content: space-around;
}

input[type="text"] {
  border: solid 1px var(--primary-color);
  padding: 10px;
  border-radius: 8px;
  margin-right: 4px;
  display: inline-block;
  width: 30%;
}

button {
  padding: 10px;
  border: solid 1px var(--primary-color);
  background: var(--primary-color);
  color: white;
  border-radius: 8px;
}

@media (min-width: 500px) and (max-width: 768px) {
  .results {
      grid-template-columns: repeat(2, 1fr);
  }
  input[type="text"] {
      width: 70%;
  }
}

@media (max-width: 499px) {
  .results {
      grid-template-columns: 1fr;
  }
}housing-location.component.css:
.listing {
    background: var(--accent-color);
    border-radius: 30px;
    padding-bottom: 30px;
}

.listing-heading {
    color: var(--primary-color);
    padding: 10px 20px 0 20px;
}

.listing-photo {
    height: 250px;
    width: 100%;
    object-fit: cover;
    border-radius: 30px 30px 0 0;
}

.listing-location {
    padding: 10px 20px 20px 20px;
}

.listing-location::before {
    content: url("/assets/location-pin.svg") / "";
}

section.listing a {
    padding-left: 20px;
    text-decoration: none;
    color: var(--primary-color);
}

section.listing a::after {
    content: "\203A";
    margin-left: 5px;
}styles.css:
* {
    margin: 0;
    padding: 0;
}

body {
    font-family: 'Be Vietnam Pro', sans-serif;
}

:root {
    --primary-color: #605DC8;
    --secondary-color: #8B89E6;
    --accent-color: #e8e7fa;
    --shadow-color: #E8E8E8;
}

button.primary {
    padding: 10px;
    border: solid 1px var(--primary-color);
    background: var(--primary-color);
    color: white;
    border-radius: 8px;
}
最终呈现的效果如下:
